Hi there! My name is Victor Menzing, aka VMG 206, and I am a programmer.
I started this site because I want to teach people how to build nice games without writing a lot of code.
Tutorials
Understanding the Unity Engine Editor
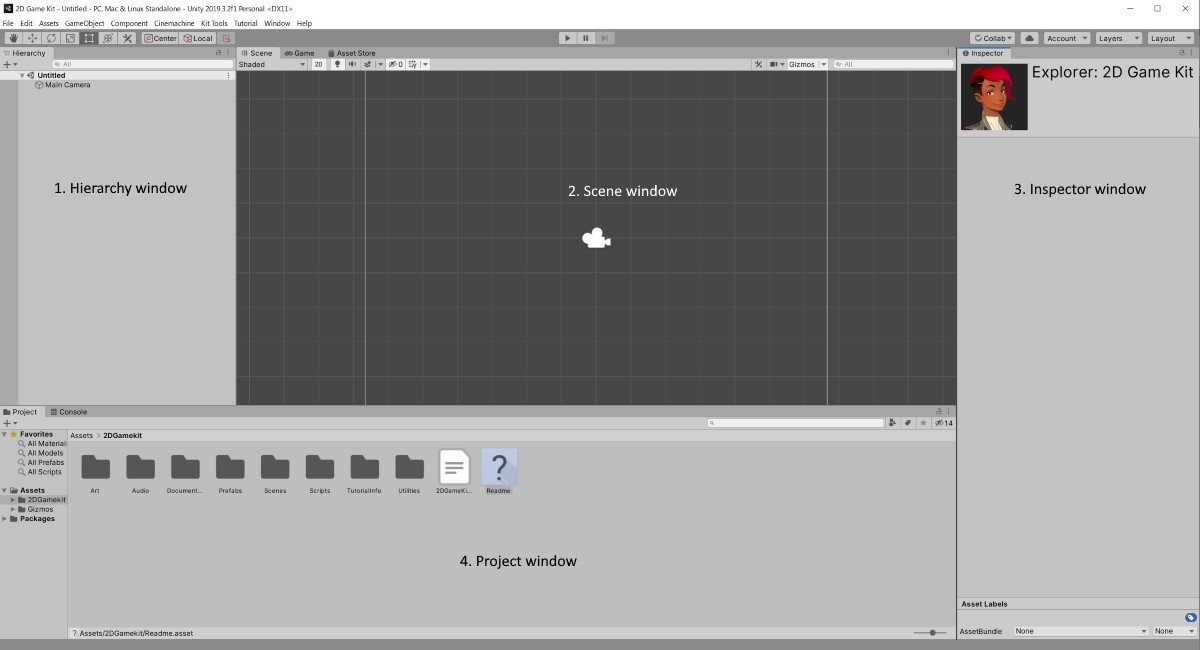
The Unity Editor displays four different windows, which look just like the ones below.
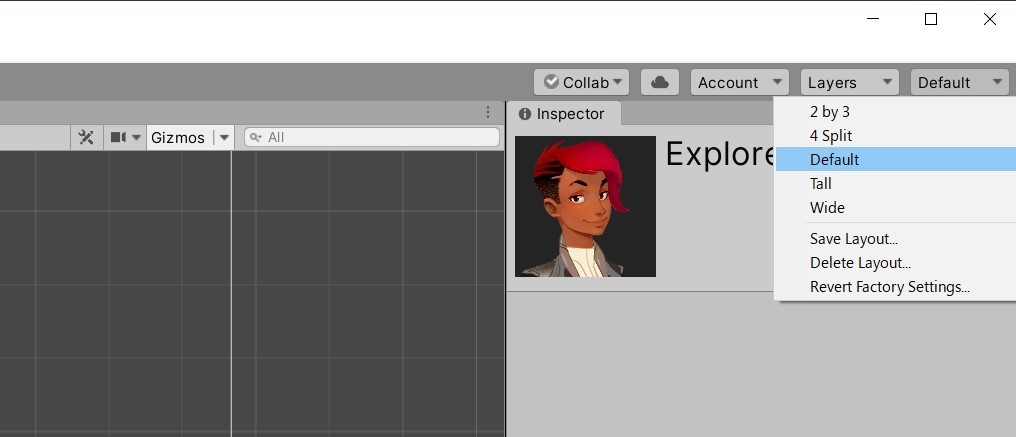
If your layout is different, choose the default setting from the drop-down layout menu in the upper right corner of the screen, the way I'm doing it in the picture below.
Here's what each editor window is about.
1. The Hierarchy window displays all the objects in a scene, a game area that is used for a specific part of the project. A game may contain a single scene, or hundreds of different scenes, depending on its complexity.
Several game objects (a model, a sound, a light, etc.) can be grouped together, if needed, and then they get linked to their parent, moving together with it.
2. The Scene window, also known as "Scene view", displays a simplified version of the current scene, allowing you to view, move, and scale objects in 2D or 3D space. Since this is a preview window, lighting quality and shadows aren't at their best, but this view is perfect for people who want to work efficiently and test the details later, rather than compiling their projects every minute or so.
3. The Inspector window displays all the properties of the currently selected object. If you select the player object, for example, you will get to see and adjust its position, angles, scale, material, scripts, etc.
4. Finally, the Project window stores the actual files that are used for the game. It is an in-game version of Windows Explorer, if you will. Load a properly organized project and you will see folder names such as "Art", "Audio", "Prefabs" and "Scenes" inside it.
By the way, prefabs are collections of game objects which can be used in your projects over and over. Let's imagine that you want to place lots of lamp posts in your RPG game; you could group a few models and their associated light sources into a single prefab, which can then be inserted into your project whenever it is needed.
Let's explore the most important elements of the Unity Editor's Toolbar. I have added those little white numbers to make the process easier for you.
1. The Hand Tool allows us to pan around the scene. If you have got a mouse with 3 buttons, click the middle button to use this feature. You will get similar results if you press the "Q" key on your keyboard.
2. The Move Tool allows us to select, and then move individual game objects. If you prefer keyboard shortcuts, use the "W" key to access this tool.
3. The Rotate Tool allows us to rotate individual game objects. Press "E" to enable it.
4. The Scale Tool allows us to change the size of the currently selected game object. Use "R" to activate it.
5. Play runs the current scene, showing it to us in a 2D or 3D window, depending on the type of project that we are building.
6. Pause stops the current scene.
7. Step allows us to step through our games as they run, helping us understand if everything works properly, or giving us the possibility of catching bugs (if any).
These are the most important Unity Editor features that you should know about.